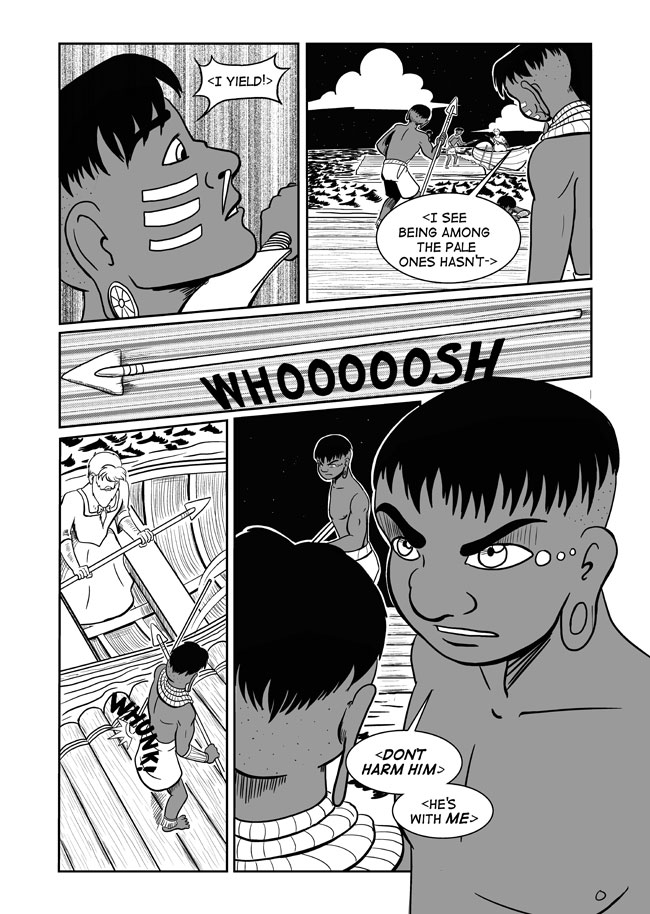
Will they listen?
Vote incentive this week continues to be “Gambling Blues”. Vote to see this exclusive mini-comic for free this week only!
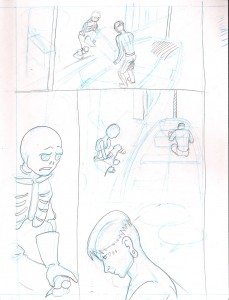
On to part three of my work process (I bet ya’ll thought I forgot, didn’t you?) The sketch! As a reminder, we’re using this page as an example.
This sketch is how I used to work; non-photo blue line sketches with graphite once I had the details I wanted. Why non-photo blue you ask? I started using non-photo blue when I inked directly on my pages; the scanner only picked up the black ink and I could easily get rid of the blue lines once I got them on my computer, back before I was comfortable inking on my computer. When I started inking directly on the computer, I started working on really crappy paper, the kind you use in your printer. I have a tendency to erase a lot. If you erase a lot on really crappy paper, you either tear it, rub the fiber down to non-usable flatness, or rub holes into it. Either way, this makes the process frustrating, especially when you’re on a tight time crunch. So, I used the non photo blue pencil to work out my sketches and the graphite to define where I wanted to put the inks.
You’re probably noticing a couple of things: one, that the background is not really detailed, and two, that the final panel is completely different. When I started inking on the computer, I noticed that the perspective grids I made for myself on paper never matched up with the ones I put on the computer when I needed to ink. This probably makes me a bad artist, but I figured I could forgo all the work involved in making a detailed background in the penciling stage and do all that on the computer later. As for the final panel; I wasn’t too satisfied with it when I saw it. It didn’t have quite the emotional impact I wanted. So, I changed it.


Discussion ¬